
Maintenance & Inspection · practical Corolla guide
Toyota Corolla Shock Absorber and Strut Wear Signs
Ride complaints are influenced by tires, springs, mounts, bushings and alignment as well as dampers. A complete corner inspection is more useful than a simple bounce test.
Quick answer
What to do first
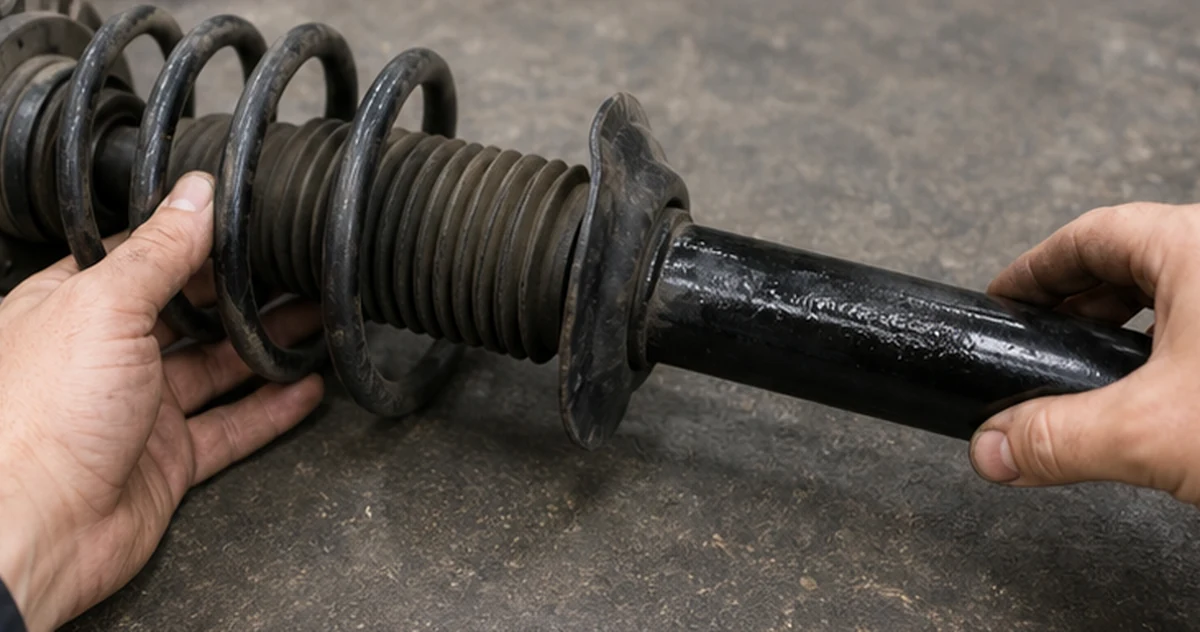
Inspect each damper for active oil leakage, damaged rod or boot and mounting play, then compare vehicle behavior and tire wear across the axle.
01 · Observe the condition
Signs that justify a closer inspection
One sign rarely identifies one failed part. Record when it occurs, compare both sides or cylinders where applicable, and preserve diagnostic evidence before clearing or replacing anything.
Active oil wetness runs down the damper body
Use this as an observation to investigate, not as automatic proof that the related component has failed.
Vehicle continues to oscillate after a road disturbance
Use this as an observation to investigate, not as automatic proof that the related component has failed.
Knocking appears at a mount or lower attachment
Use this as an observation to investigate, not as automatic proof that the related component has failed.
Tire shows cupping alongside reduced wheel control
Use this as an observation to investigate, not as automatic proof that the related component has failed.
02 · Separate similar faults
Evidence to collect before choosing a part
| Check | Record | Why it matters |
|---|---|---|
| Position | Front/rear and left/right strut where applicable | Brackets and spring seats can be side-specific |
| Assembly scope | Bare damper, complete strut or defined kit | Quoted contents must be comparable |
| Mounting | Upper mount, bearing, lower bracket and sensor tabs | A damper alone may not address mount noise |
| Related chassis | Springs, bushings, ball joints and tires | Several worn parts can create similar symptoms |
03 · Practical sequence
A safer inspection order
Prepare and document
Observe behavior on a safe road without intentionally provoking instability.
Inspect the complete system
Inspect all four corners for leakage, damage and mounting condition.
Verify the evidence
Compare tire wear and suspension joints before blaming the damper alone.
Match the service scope
List side, position and included mount or protection kit scope before ordering.
04 · Prepare the inspection
What to have ready before touching the part
Good evidence prevents a symptom check from turning into guesswork. Work on a cool, stable vehicle where appropriate and keep the observations tied to the exact Corolla in front of you.
Vehicle record
Write down production year or date, chassis or model code, engine or hybrid designation and destination market. Keep any stored diagnostic codes or dashboard messages exactly as observed.
Part record
Photograph the installed position, connector or mounting details, readable markings and the surrounding components. For this check, pay particular attention to front/rear and left/right strut where applicable.
Safe comparison
Use the opposite side, another cylinder or a known-good operating condition only when the comparison is mechanically valid. Quoted contents must be comparable.
05 · Interpret the findings
Turn observations into a defensible next step
The aim is to confirm a pattern, rule out credible look-alike faults and preserve enough evidence for service or part identification.
Position
Record: Front/rear and left/right strut where applicable. Reason: Brackets and spring seats can be side-specific. Compare that evidence with the reported condition “Active oil wetness runs down the damper body” instead of treating either observation as proof on its own.
Assembly scope
Record: Bare damper, complete strut or defined kit. Reason: Quoted contents must be comparable. Compare that evidence with the reported condition “Vehicle continues to oscillate after a road disturbance” instead of treating either observation as proof on its own.
Mounting
Record: Upper mount, bearing, lower bracket and sensor tabs. Reason: A damper alone may not address mount noise. Compare that evidence with the reported condition “Knocking appears at a mount or lower attachment” instead of treating either observation as proof on its own.
Related chassis
Record: Springs, bushings, ball joints and tires. Reason: Several worn parts can create similar symptoms. Compare that evidence with the reported condition “Tire shows cupping alongside reduced wheel control” instead of treating either observation as proof on its own.
06 · Avoid false conclusions
Common mistakes during diagnosis or replacement planning
Replacing from one symptom
Active oil wetness runs down the damper body can justify inspection, but it cannot isolate the cause by itself. Confirm the related system and look for the other recorded signs before purchasing a component.
Matching by appearance
A light residual film is not evaluated the same as active leakage. Use component-specific service criteria and physical inspection. Similar shape, plug style or overall dimensions should be treated as supporting evidence, never as the complete application decision.
Skipping the cause of wear
When a removed part is damaged, ask what produced the damage. A new component may fail again if contamination, wiring, mounting, lubrication, heat or an adjacent mechanical fault remains unresolved.
07 · Application boundary
Corolla name and year are not enough
A light residual film is not evaluated the same as active leakage. Use component-specific service criteria and physical inspection.
For a parts inquiry, record the generation or production date, market, engine or hybrid designation, side or position, old-part reference, connector or mounting evidence and the required quantity. A public reference is an identification lead only and never universal fitment proof.
08 · Verify the outcome
Checks to make after service or before ordering
Confirm the evidence
Compare tire wear and suspension joints before blaming the damper alone. Keep the measurement, scan record or comparison result with the vehicle notes so the decision can be reviewed later.
Confirm the component scope
List side, position and included mount or protection kit scope before ordering. Make sure seals, clips, brackets, hardware or paired axle components are stated separately rather than assumed.
Confirm normal operation
After qualified service, check that the original symptom is gone, no new warning or leak is present and the related system behaves consistently. Stop and recheck if the condition returns or safety changes.
10 · Common questions
Before replacing or ordering the part
Does a bounce test prove a shock is bad?
No. It is a rough observation and cannot isolate mounts, springs, tires or bushings.
Should shocks be replaced in pairs?
They are commonly evaluated and serviced by axle to maintain comparable damping.
Does a complete strut include the mount?
Not every supplier uses the same definition. Require a written contents list.
Safety and application note
Use these checks as general inspection and part-identification guidance. Corolla generations, engines, hybrid systems, body variants and markets differ, so follow the service information applicable to the exact vehicle and seek qualified help whenever the task involves safety systems, pressurized fluid, high current, stored energy or uncertain diagnosis.
Continue with more maintenance & inspection guides, or return to the complete Corolla maintenance and parts guide library.